在这篇博文中,我们将指导您逐步将 faceio 的人脸身份验证合并到 next.js 应用程序中,从设置 faceio 帐户到在代码库中实现集成。
先决条件
在我们深入之前,请确保您已准备好以下内容:
node.js 和 npm:确保您的开发计算机上安装了 node.js 和 npm。您可以从 node.js 官方网站下载最新版本。
next.js:您需要设置一个 next.js 项目。如果没有,您可以创建一个新的:
- faceio 帐户:在 faceio 控制台上注册 faceio 帐户。您将在此处创建 faceio 应用程序并获取必要的凭据。
设置 faceio 应用程序
1.创建新的 faceio 应用程序:登录到您的 faceio 控制台并单击“创建新应用程序”按钮。
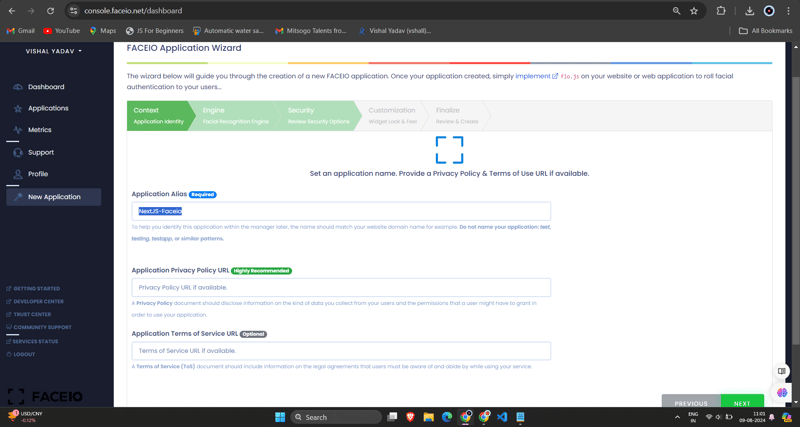
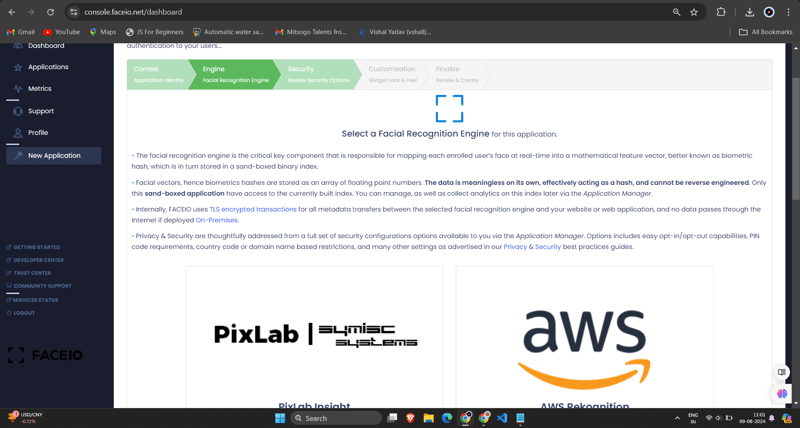
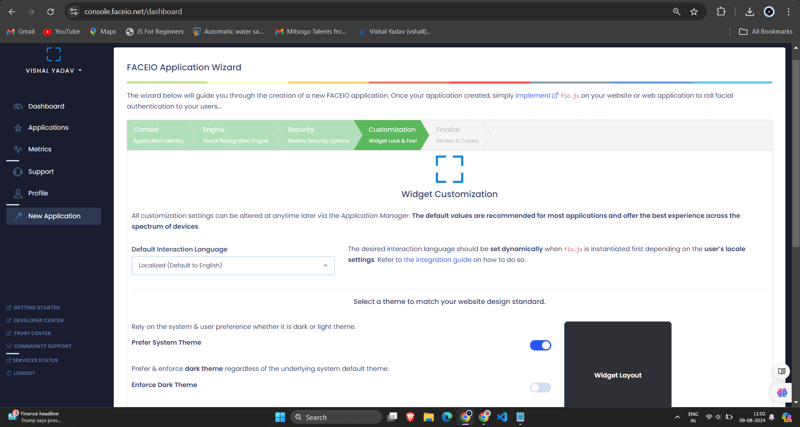
2.配置应用程序:填写所需信息,例如应用程序名称、描述和回调 url(这将是您的 next.js 应用程序的 url)。填写完表格后,点击“创建应用程序”。
3.获取faceio_app_id:创建应用程序后,您将获得一个唯一的faceio_app_id。这是您将用于将 faceio 集成到 next.js 应用程序中的标识符。
将 faceio 集成到您的 next.js 应用程序中
1.安装faceio npm包:在你的next.js项目中,使用npm或yarn安装faceio-npm包:
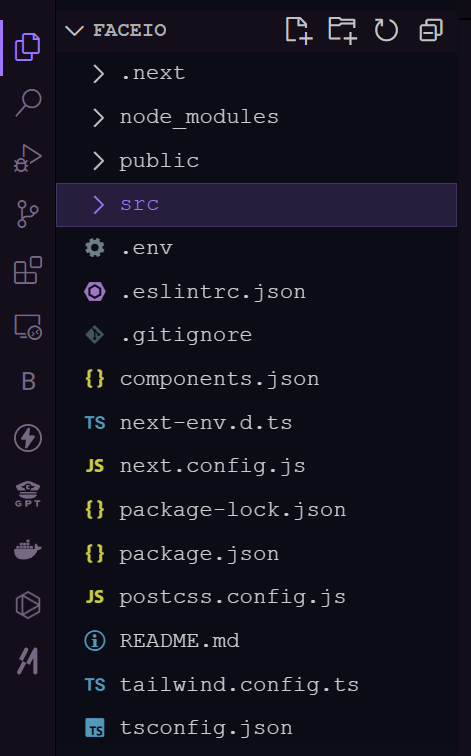
2.创建人脸验证组件:在您的 next.js 项目中,使用以下代码创建一个名为 components/dashboard.tsx (或您喜欢的任何其他名称)的新文件:
// dashboard.tsx
import react from "react";
import { card, cardheader, cardtitle, cardcontent } from "@/components/ui/card";
import { button } from "@/components/ui/button";
import { fausercircle, falock, facode, fachartbar, fasignoutalt } from 'react-icons/fa';
interface dashboardprops {
useremail: string;
onlogout: () => void;
}
const dashboard: react.fc<dashboardprops> = ({ useremail, onlogout }) => {
return (
<div classname="max-w-7xl mx-auto p-4 md:p-6 space-y-6">
<card classname="w-full bg-black text-white"><cardheader classname="flex flex-col sm:flex-row items-start sm:items-center justify-between space-y-4 sm:space-y-0"><div>
<cardtitle classname="text-2xl sm:text-3xl font-bold">welcome to faceio</cardtitle><p classname="text-base sm:text-lg mt-2">email: {useremail}</p>
</div>
<button variant="secondary" size="sm" onclick="{onlogout}" classname="flex items-center w-full sm:w-auto justify-center mt-8">
<fasignoutalt classname="mr-2"></fasignoutalt> logout
</button>
</cardheader><cardcontent><p classname="text-lg sm:text-xl mb-4">you have successfully logged in.</p>
</cardcontent></card><h2 classname="text-xl sm:text-2xl font-bold text-center my-6">facial authentication for the web</h2>
<div classname="grid grid-cols-1 sm:grid-cols-2 gap-4 sm:gap-6">
<card><cardheader><cardtitle classname="flex items-center text-base sm:text-lg"><fausercircle classname="mr-2"></fausercircle> secure & easy
</cardtitle></cardheader><cardcontent><p classname="text-sm sm:text-base">cross-browser, secure & easy to implement. passwordless authentication sdks powered by face recognition for web sites & apps.</p>
</cardcontent></card><card><cardheader><cardtitle classname="flex items-center text-base sm:text-lg"><falock classname="mr-2"></falock> privacy-focused
</cardtitle></cardheader><cardcontent><p classname="text-sm sm:text-base">your facial data is encrypted and securely stored. we prioritize user privacy and data protection.</p>
</cardcontent></card><card><cardheader><cardtitle classname="flex items-center text-base sm:text-lg"><facode classname="mr-2"></facode> developer-friendly
</cardtitle></cardheader><cardcontent><p classname="text-sm sm:text-base">easy integration with clear documentation. get started quickly and implement facial authentication in your projects.</p>
</cardcontent></card><card><cardheader><cardtitle classname="flex items-center text-base sm:text-lg"><fachartbar classname="mr-2"></fachartbar> analytics & insights
</cardtitle></cardheader><cardcontent><p classname="text-sm sm:text-base">gain valuable insights into user authentication patterns and improve your applications security.</p>
</cardcontent></card>
</div>
<div classname="flex flex-col sm:flex-row justify-center items-center space-y-4 sm:space-y-0 sm:space-x-4 mt-8">
<button variant="default" size="lg" classname="w-full sm:w-auto">
get started →
</button>
<button variant="outline" size="lg" classname="w-full sm:w-auto">
integration guide →
</button>
<button variant="secondary" size="lg" classname="w-full sm:w-auto">
faceio console →
</button>
</div>
<card classname="mt-8 bg-gray-100"><cardcontent classname="text-center py-6"><p classname="text-base sm:text-lg font-semibold">ready to implement facial authentication in your project?</p>
<p classname="mt-2 text-sm sm:text-base">check out our documentation and start securing your application today!</p>
</cardcontent></card>
</div>
);
};
export default dashboard;
</dashboardprops>3.将 dashboard.tsx 组件导入 login.tsx 组件:
/* eslint-disable react-hooks/exhaustive-deps */
"use client";
import {
card,
cardcontent,
carddescription,
cardfooter,
cardheader,
cardtitle,
} from "@/components/ui/card";
import { terminal } from "lucide-react";
import { mailicon, checkcircleicon } from "lucide-react";
import { alert, alertdescription, alerttitle } from "@/components/ui/alert";
import { input } from "@/components/ui/input";
import { label } from "@/components/ui/label";
import { button } from "./ui/button";
import faceio from "@faceio/fiojs";
import { useeffect, useref, usestate } from "react";
import link from "next/link";
import { toast } from "sonner";
import dashboard from "./dashboard";
type props = {};
const login: react.fc<props> = ({}) => {
const faceioref = useref<faceio null>(null);
const [email, setemail] = usestate("");
const [userlogin, setuserlogin] = usestate("");
const [isloggedin, setisloggedin] = usestate(false);
const publickey = process.env.next_public_faceio_public_id as string;
const initialisefaceio = async () => {
try {
faceioref.current = new faceio(publickey);
console.log("faceio initialized successfully");
} catch (error) {
console.log(error);
handleerror(error);
}
};
useeffect(() => {
initialisefaceio();
}, []);
const handleregister = async () => {
try {
if (!faceioref.current) {
console.error("faceio instance is not initialized");
return;
}
await faceioref.current?.enroll({
userconsent: false,
locale: "auto",
payload: { email: `${email}` },
});
toast.success("successfully registered user.");
} catch (error) {
handleerror(error);
faceioref.current?.restartsession();
}
};
const handlelogin = async () => {
try {
const authenticate = await faceioref.current?.authenticate();
console.log("user authenticated successfully:", authenticate);
setuserlogin(authenticate.payload.email);
setisloggedin(true);
toast.success("successfully logged in.");
} catch (error) {
console.log(error);
handleerror(error);
}
};
const handlelogout = () => {
setisloggedin(false);
setuserlogin("");
toast.success("successfully logged out.");
};
function handleerror(errcode: any) {
const fioerrs = faceioref.current?.fetchallerrorcodes()!;
switch (errcode) {
case fioerrs.permission_refused:
toast.info("access to the camera stream was denied by the end user");
break;
case fioerrs.no_faces_detected:
toast.info(
"no faces were detected during the enroll or authentication process"
);
break;
case fioerrs.unrecognized_face:
toast.info("unrecognized face on this application's facial index");
break;
case fioerrs.many_faces:
toast.info("two or more faces were detected during the scan process");
break;
case fioerrs.face_duplication:
toast.info(
"user enrolled previously (facial features already recorded). cannot enroll again!"
);
break;
case fioerrs.minors_not_allowed:
toast.info("minors are not allowed to enroll on this application!");
break;
case fioerrs.pad_attack:
toast.info(
"presentation (spoof) attack (pad) detected during the scan process"
);
break;
case fioerrs.face_mismatch:
toast.info(
"calculated facial vectors of the user being enrolled do not matches"
);
break;
case fioerrs.wrong_pin_code:
toast.info("wrong pin code supplied by the user being authenticated");
break;
case fioerrs.processing_err:
toast.info("server side error");
break;
case fioerrs.unauthorized:
toast.info(
"your application is not allowed to perform the requested operation (eg. invalid id, blocked, paused, etc.). refer to the faceio console for additional information"
);
break;
case fioerrs.terms_not_accepted:
toast.info(
"terms & conditions set out by faceio/host application rejected by the end user"
);
break;
case fioerrs.ui_not_ready:
toast.info(
"the faceio widget could not be (or is being) injected onto the client dom"
);
break;
case fioerrs.session_expired:
toast.info(
"client session expired. the first promise was already fulfilled but the host application failed to act accordingly"
);
break;
case fioerrs.timeout:
toast.info(
"ongoing operation timed out (eg, camera access permission, tos accept delay, face not yet detected, server reply, etc.)"
);
break;
case fioerrs.too_many_requests:
toast.info(
"widget instantiation requests exceeded for freemium applications. does not apply for upgraded applications"
);
break;
case fioerrs.empty_origin:
toast.info("origin or referer http request header is empty or missing");
break;
case fioerrs.forbiddden_origin:
toast.info("domain origin is forbidden from instantiating fio.js");
break;
case fioerrs.forbiddden_country:
toast.info(
"country iso-3166-1 code is forbidden from instantiating fio.js"
);
break;
case fioerrs.session_in_progress:
toast.info(
"another authentication or enrollment session is in progress"
);
break;
case fioerrs.network_io:
default:
toast.info(
"error while establishing network connection with the target faceio processing node"
);
break;
}
}
if (isloggedin) {
return <dashboard useremail="{userlogin}" onlogout="{handlelogout}"></dashboard>;
}
return (
<div classname="min-h-screen bg-gradient-to-r from-cyan-500 to-blue-500 flex items-center justify-center p-4 w-full">
<card classname="w-[400px] bg-white shadow-xl rounded-xl overflow-hidden"><cardheader classname="bg-gray-50 border-b p-6"><cardtitle classname="text-2xl font-bold text-gray-800">
secure workspace
</cardtitle><carddescription classname="text-sm text-gray-600">
authenticate to access your personalized work environment
</carddescription></cardheader><cardcontent classname="p-6 space-y-4"><div classname="space-y-2">
<label htmlfor="email" classname="text-sm font-medium text-gray-700">
work email
</label>
<input id="email" type="email" placeholder="you@company.com" classname="w-full px-3 py-2 border rounded-md" onchange="{(e)"> setemail(e.target.value)}
/>
</div>
<div classname="space-y-4">
<button classname="w-full bg-blue-600 hover:bg-blue-700 text-white font-medium py-2 rounded-md transition duration-300 ease-in-out" onclick="{handlelogin}">
access workspace
</button>
<button classname="w-full bg-gray-100 hover:bg-gray-200 text-gray-800 font-medium py-2 rounded-md transition duration-300 ease-in-out" onclick="{handleregister}" disabled>
register new account
</button>
</div>
</cardcontent><cardfooter classname="bg-gray-50 border-t p-4"><div classname="w-full text-center text-xs text-gray-500">
protected by faceio™ technology.
<link href="https://faceio.net/security-policy" classname="text-blue-600 hover:underline ml-1">
learn about our security measures
</div>
</cardfooter></card>
{userlogin && !isloggedin && (
<div classname="fixed bottom-4 right-4 bg-green-100 border-l-4 border-green-500 text-green-700 p-4 rounded-md shadow-lg">
<div classname="flex">
<div classname="flex-shrink-0">
<checkcircleicon classname="h-5 w-5 text-green-500"></checkcircleicon>
</div>
<div classname="ml-3">
<p classname="text-sm font-medium">workspace access granted</p>
<p classname="text-xs mt-1">logged in as: {userlogin}</p>
</div>
</div>
</div>
)}
</div>
);
};
export default login;
</faceio></props>记得将 'next_public_faceio_public_id' 替换为您从 faceio 控制台获取的实际 faceio_app_id。
- 将人脸验证组件集成到您的 next.js 页面中:在 next.js 应用程序的主页(例如 app/page.tsx)中,导入 home 组件并渲染它:
import { buttonVariants } from "@/components/ui/button";
import { cn } from "@/lib/utils";
import Link from "next/link";
import { FaUserShield, FaImage, FaCode, FaRobot } from 'react-icons/fa';
export default function Home() {
const demos = [
{ title: "FACIO Web Authentication", href: "/faceio", icon: FaUserShield },
{ title: "Image Processing", href: "/imageprocessing", icon: FaImage },
{ title: "Code Generation", href: "/codegeneration", icon: FaCode },
{ title: "AI Assistant", href: "/aiassistant", icon: FaRobot },
];
return (
<div classname="max-h-screen bg-gradient-to-br from-purple-700 via-blue-600 to-teal-500 text-white p-8 w-full">
<div classname="max-w-6xl mx-auto">
<h1 classname="text-5xl md:text-7xl font-bold text-center mb-8 animate-fade-in-down">
PixLab Faceio
</h1>
<p classname="text-xl text-center mb-12 animate-fade-in-up">
Explore cutting-edge technologies and innovative solutions
</p>
<div classname="grid grid-cols-1 md:grid-cols-2 gap-8">
{demos.map((demo, index) => (
<link key="{demo.href}" href="%7Bdemo.href%7D" classname="{cn(" buttonvariants variant: text-lg font-semibold flex flex-col items-center justify-center space-y-4 bg-white bg-opacity-10 backdrop-filter backdrop-blur-lg rounded-xl hover:bg-opacity-20 transition-all duration-300 animate-fade-in index>
<demo.icon classname="text-4xl"></demo.icon>
{demo.title}
))}
</div>
<div classname="mt-16 text-center animate-fade-in-up animate-delay-300">
<h2 classname="text-3xl font-bold mb-4">Why Choose PixLab?</h2>
<ul classname="text-lg space-y-2">
<li>✨ Cutting-edge technologies</li>
<li>? High-performance solutions</li>
<li>? Advanced security features</li>
<li>? Seamless integrations</li>
</ul>
</div>
<footer classname="mt-16 text-center text-sm opacity-75 animate-fade-in-up animate-delay-500">
© 2024 PixLab. All rights reserved. Empowering innovation through technology.
</footer>
</div>
</div>
);
}
就是这样!您现在已将 faceio 的人脸身份验证集成到您的 next.js 应用程序中。当用户点击“面部验证”按钮时,faceio 小部件将会出现,指导他们完成身份验证过程。
捕获正在运行的 faceio 小部件 - 注册
为了演示 faceio 小部件的功能,让我们捕获注册过程的 gif:

此 gif 展示了 next.js 应用程序中 faceio 人脸注册过程的用户体验。用户可以轻松注册自己的脸部,用于以后登录时的无缝身份验证。
捕获正在运行的 faceio 小部件
为了演示 faceio 小部件的功能,让我们捕获身份验证过程的 gif:
此 gif 展示了 next.js 应用程序中 faceio 人脸身份验证过程的用户体验。
faceio 应用程序的关键安全最佳实践
消除重复注册:启用设置以阻止同一用户多次注册,避免潜在的冲突或误用。
加强反欺骗措施:激活检测和阻止人脸欺骗尝试的功能,确保系统仅与真实的用户交互。
保证 pin 唯一性:确保每个用户的 pin 在应用程序内是唯一的,以防止未经授权的访问。
实施地理限制:将 faceio 小部件的实例化限制为授权域名和国家/地区,以增加安全控制。
在 next.js 应用程序中使用 faceio 的好处
将 faceio 集成到您的 next.js 应用程序中具有以下几个好处:
改进的用户体验:faceio 小部件提供无缝且直观的身份验证流程,使用户可以轻松登录您的应用程序。
跨平台兼容性:faceio 可跨各种设备和浏览器工作,确保一致的用户体验。
轻松集成:faceio-npm 包简化了集成过程,让您可以快速将人脸身份验证添加到 next.js 应用程序中。
faceio社区论坛:您可以从faceio社区获得问题帮助。
结论
在这篇博文中,您学习了如何将 faceio 的人脸身份验证服务集成到您的 next.js 应用程序中。通过执行此处概述的步骤,您现在可以为用户提供安全且用户友好的身份验证体验,从而提高 web 应用程序的整体质量。
如果您还有任何其他问题或需要其他帮助,请随时联系 faceio 支持团队或浏览全面的 faceio 文档。
快乐编码!
有关此实现的完整源代码,您可以访问 github 存储库并详细探索该项目。

![Pull 请求上关闭操作的代理 [DroneCI + GitHub]](/e/data/tmp/titlepic/27c5769f855c013e43725e083050c1b6.jpg)

